Frameworkless Frontend Development - 2. 렌더링
Francesco Strazzullo님의 프레임워크 없는 프론트 엔드 개발(원제 Frameworkless Frontend Development)을 읽고 요악하는 포스트입니다.
DOM
웹 어플리케이션을 구성하는 요소를 조작할 수 있는 API. 트리로 구성되어 있다.
렌더링 성능 모니터링
웹용 렌더링 엔진을 설계할 때는 가독성(readability), 유지 관리성(maintainability)과 성능(performance)을 염두해 두어야 한다.
Chrome DevTools
열기
- Chrome 메뉴에서
도구 더보기>개발자 도구선택 - 페이지 요소를 클릭하고 검사를 선택
Cmd + Opt + I(Mac) orCtrl + Shift + I(Windows)
FPS 측정
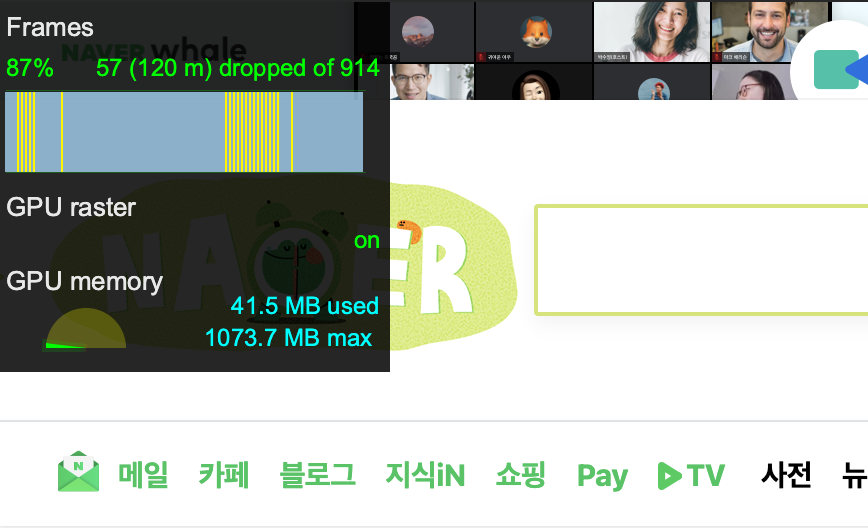
Cmd + Shift + P > Show frame per seconds (FPS) meter
stats.js
웹 어플리케이션에 포함시켜 프레임을 렌더링하는데 필요한 밀리초를 표시할 수 있다.
렌더링 함수
순수 함수를 사용해 렌더링 하는 방법을 분석해본다.
view = f(state)
순수 함수라는 것은 DOM 요소가 어플리케이션의 상태에만 의존한다는 것을 의미한다.
순수함수 렌더링 - Chapter2/02
index.js
const main = document.querySelector('.todoapp')

window.requestAnimationFrame(() => {
  const newMain = appView(main, state)
  main.replaceWith(newMain)
})
view 함수를 통해 main component를 업데이트 한다.
childNode.replaceWith(newNodes): 현재 노드(childNode)를 새로운 노드(newNodes)로 대체한다.
app.js
export default (targetElement, state) => {
  const element = targetElement.cloneNode(true)

  const list = element
    .querySelector('.todo-list')
  const counter = element
    .querySelector('.todo-count')
  const filters = element
    .querySelector('.filters')

  list.replaceWith(todosView(list, state))
  counter.replaceWith(counterView(counter, state))
  filters.replaceWith(filtersView(filters, state))

  return element
}
appView 함수에서는 업데이트 해야하는 component를 각 view 함수로 연결해준다.
Node.cloneNode(deep: boolean): 현재 노드를 복제하여 새로운 노드를 생성한다. deep이 false이면 하위 트리는 제외하고 현재노드만 복제한다.
todos.js
const getTodoElement = todo => {
  const {
    text,
    completed
  } = todo

  return `
      <li ${completed ? 'class="completed"' : ''}>
        ...
      </li>`
}

export default (targetElement, { todos }) => {
  const newTodoList = targetElement.cloneNode(true)
  const todosElements = todos
    .map(getTodoElement)
    .join('')
  newTodoList.innerHTML = todosElements
  return newTodoList
}
view 함수별로 각각의 알고리즘을 통해 현재 state에 따른 새로운 node를 생성한다.
이 view 함수들은 output이 input(state)에만 영향을 받는 순수 함수이다.
구성 요소 함수(component function) - Chapter2/03
위 예제에서는 list, counter, filters 별로 올바른 view 함수를 수동으로 호출해야 한다. 이부분을 구성 요소 레지스트리 (component registry)를 사용하여 자동으로 연결해줄 수 있다.
index.html
<ul class="todo-list" data-component="todos">
레지스트리 예시
const registry = {
  'todos': todosView.
  ...
}
html의 dataset attribute를 이용한다. registry의 key와 data-component 값을 일치시키고 각 component의 view 함수를 담는다.
registry.js
const registry = {}

const add = (name, component) => {
  registry[name] = renderWrapper(component)
}

const renderRoot = (root, state) => {
  const cloneComponent = root => {
    return root.cloneNode(true)
  }

  return renderWrapper(cloneComponent)(root, state)
}

const renderWrapper = component => {
  return (targetElement, state) => {
    const element = component(targetElement, state)

    const childComponents = element
      .querySelectorAll('[data-component]')

    Array
      .from(childComponents)
      .forEach(target => {
        const name = target
          .dataset
          .component

        const child = registry[name]
        if (!child) {
          return
        }

        target.replaceWith(child(target, state))
      })

    return element
  }
}
고차함수(High Order Function) renderWrapper로 view 함수를 래핑하였다. 이 래퍼함수는 원래 component(targetElement)를 복제한 뒤 새로운 state을 반영하여 반환한다.
data-component attribute를 가진 하위 element를 찾고, 발견되면 자식 component(child)를 호출한다. 이 자식 component도 같은 renderWrapper로 래핑되어 있다.
이런 방식으로 재귀함수 처럼 마지막 자식 component 까지 탐색하여 업데이트할 수 있다. 모든 component들이 다른 component안에 포함되어 사용할 수 있게 된다.
index.js
registry.add('todos', todosView)
registry.add('counter', counterView)
registry.add('filters', filtersView)

window.requestAnimationFrame(() => {
  const main = document.querySelector('.todoapp')
  const newMain = registry.renderRoot(main, state)
  main.replaceWith(newMain)
})
controller에서 registry 설정을 해준다.
Virtural DOM - Chapter2/05
UI 변경 사항을 실제 DOM에 적용시키기전에 기존 DOM과 비교한 후 변경된 부분(element)만 업데이트하면 성능을 개선시킬 수 있다. 이때 변경된 UI를 담아놓는 메모리를 Virtual DOM이라고 하며, 실제 DOM과 비교하는 작업을 reconciliation이라고 부른다.
<ul>
  <li>First Item</li>
</ul>

<ul>
  <li>First Item</li>
  <li>Second Item</li>
</ul>
위 처럼 리스트를 변경시킬때 기존 알고리즘은 전체 ul을 교체하였다. 하지만 Virtual DOM을 사용하면 마지막 li만 실제 변경이 필요한 element라는 것을 알 수 있다.
변경이 필요한 부분을 찾아내는 diff 알고리즘이 핵심이다.
applyDiff.js
const applyDiff = (
  parentNode,
  realNode,
  virtualNode) => {
  if (realNode && !virtualNode) {
    realNode.remove()
    return
  }

  if (!realNode && virtualNode) {
    parentNode.appendChild(virtualNode)
    return
  }

  if (isNodeChanged(virtualNode, realNode)) {
    realNode.replaceWith(virtualNode)
    return
  }

  const realChildren = Array.from(realNode.children)
  const virtualChildren = Array.from(virtualNode.children)

  const max = Math.max(
    realChildren.length,
    virtualChildren.length
  )
  for (let i = 0; i < max; i++) {
    applyDiff(
      realNode,
      realChildren[i],
      virtualChildren[i]
    )
  }
}
realNode: 기존 노드, virtual Node: 대체할 새 노드
- 새 노드가 정의되지 않은경우 기존 노드는 삭제한다.
- 실제 노드는 없지만 새 노드가 존재한다면 부모노드에 추가한다.
- 두 노드가 모두 정의된 경우 두노드간 차이를 확인한다(
isNodeChanged). - 하위 노드에 대해 동일한 diff 알고리즘을 적용한다.
applyDiff.js
const isNodeChanged = (node1, node2) => {
  const n1Attributes = node1.attributes
  const n2Attributes = node2.attributes
  if (n1Attributes.length !== n2Attributes.length) {
    return true
  }

  const differentAttribute = Array
    .from(n1Attributes)
    .find(attribute => {
      const { name } = attribute
      const attribute1 = node1
        .getAttribute(name)
      const attribute2 = node2
        .getAttribute(name)

      return attribute1 !== attribute2
    })

  if (differentAttribute) {
    return true
  }

  if (node1.children.length === 0 &&
    node2.children.length === 0 &&
    node1.textContent !== node2.textContent) {
    return true
  }

  return false
}
아래의 경우에 노드가 변경된것으로 판단한다.
- 속성 수가 다른 경우
- 하나 이상의 속성이 변경된경우
- 자식이 없으며, textContent가 변경된 경우
자식이 있는 경우는 자식 node 비교단계에서 변경여부를 판단한다.
index.js
window.requestAnimationFrame(() => {
  const newMain = registry.renderRoot(main, state)
  applyDiff(document.body, main, newMain)
})
controller 부분에서 diff 알고리즘을 적용해준다.